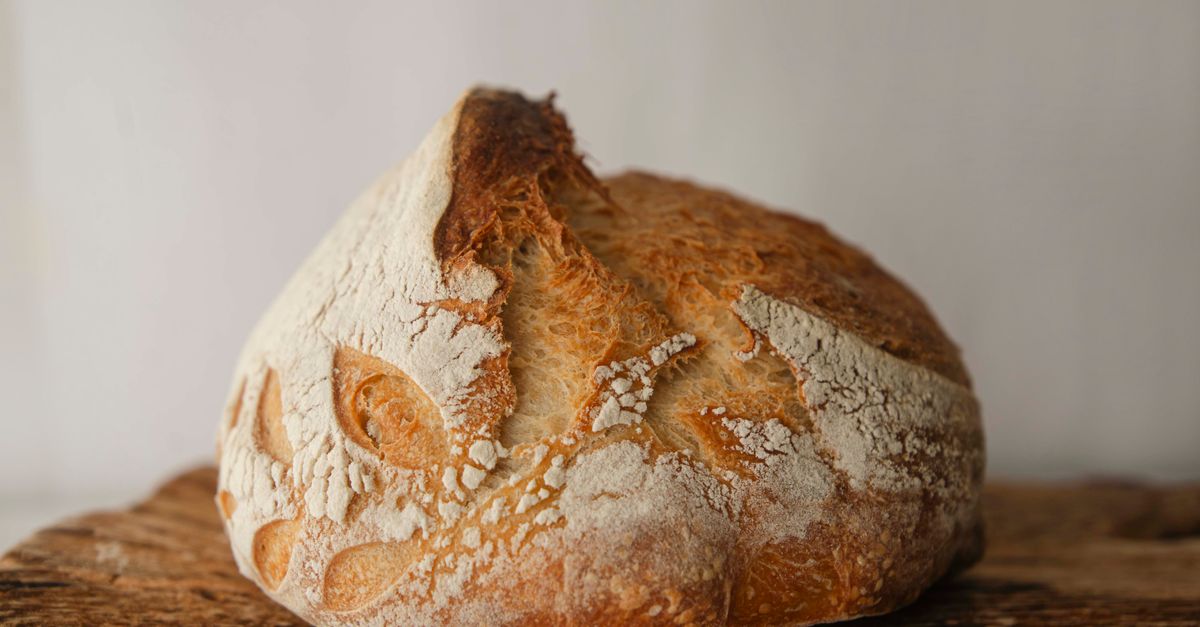
Why Your Sourdough Starter Fails Most People (And The Unconventional Tricks That Actually Work)
You’ve seen the beautiful, bubbly sourdough loaves online, perhaps even tasted one, and thought, “I can do that!” So, you gather your flour and water, mix them together, and wait. Day one, nothing. Day two, a few tiny bubbles. Day three, maybe some mold, or just… sadness. You diligently feed it, follow instructions, yet your starter remains a weak, watery disappointment, or worse, succumbs to the dreaded pink or orange film. In my years of diving deep into the world of fermentation, I’ve watched countless enthusiastic home bakers throw in the towel, convinced they just don’t have the ‘sourdough touch.’ The truth is, most conventional starter advice misses crucial nuances, leading to a host of common, easily avoidable failures. This isn’t about the perfect temperature or the exact hydration; it’s about understanding the why behind the process and leveraging some counter-intuitive techniques that truly make a difference.
Key Takeaways
- Embrace ‘neglect’ during the initial phase to encourage a stronger, more resilient microbial culture.
- Shift from precise hydration percentages to a tactile, intuitive dough-like consistency for feeding, especially initially.
- Strategically use rye flour for revival or strengthening, even if your main starter is wheat-based.
- Avoid over-feeding a struggling starter; sometimes less intervention is genuinely more beneficial.
The Beginner’s Misconception: Over-Nurturing Leads to Weakness
The most common mistake I see new sourdough enthusiasts make is treating their starter like a delicate, newborn baby that needs constant attention. They feed it meticulously every 12 or 24 hours, often discarding vast amounts of precious starter, religiously following precise ratios. While consistency is good, over-consistency and over-feeding in the initial stages can actually inhibit the development of a robust, diverse microbial population. Think about it: every time you feed, you’re introducing a fresh influx of nutrients, but also diluting the existing microorganisms and forcing them to compete aggressively for a smaller share of the new food. This can lead to a starter that spikes quickly and then crashes just as fast, lacking the sustained power needed for leavening.
What truly changed everything for me, and what I now preach to anyone starting out, is the concept of initial neglect. For the first 3-5 days, don’t worry about precise feeding schedules. Mix your flour and water, let it sit, and only feed it when you start seeing definitive signs of activity – not just a bubble or two, but a noticeable increase in volume or a distinct sour aroma. This forces the naturally occurring yeasts and bacteria to fight harder, establish dominance, and create a stronger, more resilient colony. My go-to method: Day 1, mix 50g whole wheat or rye flour with 50g water. Cover loosely. Day 2, do nothing. Day 3, if you see any bubbles or smell something fermented, discard half and feed with 50g fresh flour and 50g water. If not, wait another day. This delayed gratification builds character in your starter, making it less prone to collapse later on.
The Hydration Trap: Why Ratios Aren’t Always Your Friend (Especially Early On)
Most sourdough recipes will give you a strict hydration percentage for your starter, typically 100% (equal parts flour and water by weight). While this is a good standard for an established, healthy starter, it can be a pitfall for beginners or for struggling starters. A very wet starter can rise and fall quickly, making it hard to gauge its activity. Conversely, a very stiff starter might appear dormant when it’s just working slower. The mistake I see most often is people sticking rigidly to 100% hydration even when their starter is sluggish or overly liquid.
Instead of fixating on precise ratios, especially when you’re first building a starter or trying to revive one, I advocate for a more tactile, dough-like consistency. Aim for something that feels like a very thick pancake batter or a soft dough – something that holds its shape slightly but is still easily stirrable. For a sluggish starter, slightly decreasing the water content (e.g., aiming for 80-90% hydration) can give it a denser structure, allowing the bubbles to be more visible and providing more substrate for the microbes to cling to. For a starter that seems too stiff and slow, increasing the hydration slightly (e.g., 105-110%) can sometimes make it more active. The key here is not a hard rule, but responsiveness. Look at your starter, feel it, smell it, and adjust. This intuitive approach, rather than slavish adherence to a number, will teach you more about your starter’s needs.
The Rye Flour Secret: Your Starter’s Emergency Kit and Flavor Bomb
Many home bakers start their sourdough journey with all-purpose or bread flour, which is perfectly fine. However, if your starter is weak, slow, or just not smelling quite right, the single most powerful tool you have in your arsenal is rye flour. Rye flour is incredibly rich in nutrients and enzymes that wild yeasts and bacteria absolutely adore. It acts like a super-food supplement, giving your starter a massive boost when it needs it most.
I’ve found that even a small amount of rye flour can kick-start a dormant starter or bring a sluggish one back to life with surprising speed. Here’s my unconventional trick: if your starter is consistently underperforming, or if you’re trying to establish a new one and it’s not taking off, try feeding it exclusively with whole rye flour for 1-2 cycles. For example, discard all but 20g, then feed with 40g whole rye flour and 40g water. Watch the magic happen. You’ll likely see more robust activity, a more consistent rise and fall, and a deeper, more complex aroma. Once it’s strong, you can gradually transition back to your preferred flour, introducing it in increasing percentages over a few feedings. Even for an established starter, a ‘rye boost’ every few weeks can enhance its vitality and add a beautiful depth of flavor to your bread.
The Over-Feeding Fiasco: When Less Truly Is More
This ties back to the initial misconception, but it’s worth reiterating because it’s a failure point for so many. When a starter isn’t performing well – it’s not rising, it’s watery, or it smells off – the instinct is often to feed it more. More flour, more water, more often. The logic seems sound: it’s hungry, so feed it! However, what’s actually happening is often a competition for resources. If your starter is weak, it means the population of desirable microbes (the lactic acid bacteria and wild yeasts) might be low, or they’re not getting a chance to dominate. Constant, large feedings can exacerbate this.
Instead, consider a temporary reduction in feeding frequency or amount. If your starter is struggling, try feeding it less frequently (every 24-36 hours instead of 12) or with a smaller amount of flour. For example, if you normally feed 1:1:1 (starter:flour:water), try a 1:0.5:0.5 ratio, or even smaller, like 1:0.25:0.25 for a few cycles. This gives the existing, beneficial microbes a longer window to consume the available nutrients, reproduce, and build up their population without being constantly diluted by fresh food. It’s like letting them finish their meal and multiply before bringing in the next course. This approach, combined with the rye flour trick, has salvaged countless starters that otherwise would have been abandoned. It teaches patience and a deeper understanding of your starter’s biological rhythm.
The Scoby Analogy: Think Beyond Just ‘Yeast’
Many visualize sourdough as simply a yeast culture, but it’s much more complex and robust. It’s a symbiotic colony of bacteria and yeast (SCOBY), much like kombucha. Understanding this helps you appreciate its resilience. The lactic acid bacteria produce the acids that give sourdough its distinctive tang and also help protect it from undesirable mold and bacteria. The yeast, of course, produces the gas that makes your bread rise. A healthy starter has a good balance of both.
When your starter smells overwhelmingly of nail polish remover (acetone), it often indicates that the yeasts are stressed and producing alcohol, which they then break down into acetone. This is a sign of hunger but not necessarily a call for more frequent feeding. Often, it means the population has peaked, eaten all the available food, and is now running on fumes. Instead of a frantic feed, ensure your feeding ratio provides enough food to sustain the peak activity phase without immediately depleting it. A good rule of thumb is to feed when your starter has peaked and just begun its decline, not when it’s completely deflated and showing strong acetone smells. This ensures you’re feeding a robust, active culture at its optimal point, maintaining the delicate balance of yeast and bacteria.
Temperature Control: Not Just About Warmth, But Consistency
Yes, warmth helps, but consistent warmth is more crucial than absolute high temperatures. Many guides suggest keeping your starter in a very warm spot, sometimes even on a heating mat. While this can speed things up, it can also lead to a hyperactive starter that peaks and collapses too quickly, making it difficult to catch at the right moment for baking. It can also encourage the growth of less desirable microbes if conditions become too anaerobic and warm too quickly.
What I’ve found to be more effective is a stable, moderate temperature. Room temperature (20-24°C / 68-75°F) is perfectly adequate for maintaining a healthy, active starter. The key is consistency. Avoid drastic temperature swings. If your kitchen fluctuates wildly, find a stable spot – perhaps inside a microwave (turned off, of course), a cupboard above the fridge (if it’s not too hot), or even your oven with just the light on (be careful not to forget and preheat!). A consistent environment allows the microbes to establish a predictable rhythm, making it easier for you to learn its behavior and feed it appropriately. Don’t chase extreme warmth; chase stability. A slightly slower but more predictable starter is far more reliable for baking than a wildly fluctuating one.
Frequently Asked Questions
Q: My starter smells like nail polish remover (acetone). What does that mean?
A: An acetone smell indicates your starter is very hungry and the yeasts are producing alcohol, which can then break down into acetone. It’s a sign that your starter has consumed all its available food. While it might be hungry, don’t immediately over-feed. Try adjusting your feeding ratio to provide more sustenance per feeding, or feed slightly earlier in its cycle when it just begins to deflate, rather than waiting until it’s completely flat and producing strong acetone.
Q: My starter has a pink or orange hue, or visible mold. Can I save it?
A: Unfortunately, pink, orange, or black discoloration, or furry mold, usually indicates the presence of harmful bacteria or fungi. This starter should be discarded immediately to prevent contamination. Always err on the side of caution. Ensure your feeding jar is scrupulously clean and sanitized between uses to prevent undesirable microbial growth.
Q: How do I know when my starter is ready to bake with?
A: A healthy, active starter for baking should typically double or even triple in volume after feeding, showing lots of bubbles throughout, and pass the ‘float test’ (a small spoonful dropped in water should float). It should smell pleasantly yeasty and sour, not overwhelmingly alcoholic. Most importantly, it should peak and be used for baking as it just begins to fall back down, ensuring maximum leavening power.
Q: Can I use different types of flour for my starter?
A: Absolutely! While many start with all-purpose or bread flour, whole wheat, rye, and even spelt flours can be excellent. Whole grain flours, especially rye, contain more nutrients and often lead to a more active and robust starter. You can even experiment with blends, just be aware that different flours will affect hydration needs and flavor profiles.
Q: My starter isn’t rising much. What’s wrong?
A: Low rise can be due to several factors: insufficient warmth (aim for 20-24°C/68-75°F), a weak microbial population (try the rye flour boost or adjust feeding frequency), or over-feeding/under-feeding. Ensure you’re not diluting the active microbes too much, and allow enough time for it to ferment. Patience and observation are key here; don’t be afraid to adjust your feeding routine based on your starter’s unique behavior.
Mastering sourdough isn’t about rigid adherence to rules; it’s about developing an intuitive understanding of a living, breathing culture. By embracing initial neglect, adjusting hydration by feel, leveraging the power of rye flour, and resisting the urge to over-feed, you’ll not only avoid the most common pitfalls but also cultivate a stronger, more resilient, and ultimately more forgiving sourdough starter. So go forth, experiment, and don’t be afraid to break from conventional wisdom – your perfect loaf awaits.
Written by Evelyn Reed
Recipe development, flavor profiles, and culinary history
A former restaurant critic with a discerning palate and an uncanny ability to dissect complex flavors.
You Might Also Like

Why Most Home Cooks Fail at Caramelizing Onions (And The Unconventional Tricks That Actually Work)
Discover why your caramelized onions often fall short and learn unconventional methods for deep, rich, perfectly sweet and savory results every time. Unlock true flavor.
The Hidden Truth About Healthy Fats: Why Many Home Cooks Are Still Getting It Wrong
Unlock the secrets to healthy cooking fats. Learn which oils to really use, which to avoid, and why your current choices might be sabotaging your meals.

Why Most Home Bakers Overmix Dough (And The Simple Fixes That Guarantee Perfect Texture)
Discover the common pitfalls of overmixing dough and how slight adjustments to your technique can drastically improve your baked goods' texture.